Table of Contents
- Understanding Paint Codes and Colour Matching Technology
- Tools and Equipment for Professional Colour Matching
- How to Repair Cigarette Burns in Car Seats
- Leather Seat Refinishing Cost and Process
- Dashboard Scratch Repair Techniques
- Matching Metallic and Pearl Finishes on Interior Trim
- Surface Preparation and Application Methods
- Interior Material Specifics: Leather vs. Vinyl vs. Plastic
- Frequently Asked Questions
Last Updated: September 30, 2026
Understanding Paint Codes and Colour Matching Technology
Professional car interior colour matching starts with finding your vehicle’s exact colour code. Every car has a specific colour designation that tells you the precise shade used at the factory. This code appears on a label inside your driver’s door jamb or under the bonnet. Knowing this code is the first step toward getting a seamless repair.
Modern colour spectrometers and digital analysis capture the exact pigment blend by measuring light reflection against a database of automotive colours, accuracy DIY methods cannot achieve.
Interior colour matching differs from exterior work because leather, vinyl, and plastic absorb and reflect light differently. A shade perfect on leather may appear too dark on plastic, making material-specific knowledge essential.
Keep your vehicle’s paint code in your phone or glove box. You’ll need it for any professional repair work, and it saves time when getting quotes.
Tools and Equipment for Professional Colour Matching
Professional-grade colour matching requires specialised tools calibrated for leather, vinyl, or plastic to ensure invisible repairs.
A colour spectrometer measures light wavelengths reflecting off interior surfaces. Interior spectrometers differ from exterior analysers by accounting for material absorption rates, leather, vinyl, and plastic each absorb light differently. Professional-grade spectrometers include material-specific calibration modes that eliminate human eye error and ensure accurate readings against factory specifications.
Beyond the spectrometer, professionals use material-specific tools:
For Leather Interiors:
- Leather-compatible mixing systems that blend pigments to exact ratios without damaging natural fibres
- Soft-bristle application equipment (often airbrush or fine-mist spray) that avoids over-saturation
- Leather conditioners and sealants that restore original finish texture while maintaining breathability
- Flexible fillers designed to move with leather’s natural expansion and contraction
For Vinyl Interiors:
- Vinyl-specific paint mixing systems formulated for synthetic polymer adhesion
- Spray equipment calibrated for fine, even coverage that matches vinyl’s textured surface pattern
- Vinyl adhesion promoters that ensure colour bonds permanently without peeling
- Heat-resistant clear coats for sun-exposed dashboard and trim areas
For Plastic Components:
- Hard-set filler systems that match plastic’s rigid structure
- Plastic-compatible colour products with UV inhibitors to prevent fading
- Spray application equipment set to lower pressure to avoid plastic warping
- Adhesion primers specifically formulated for polymer bonding
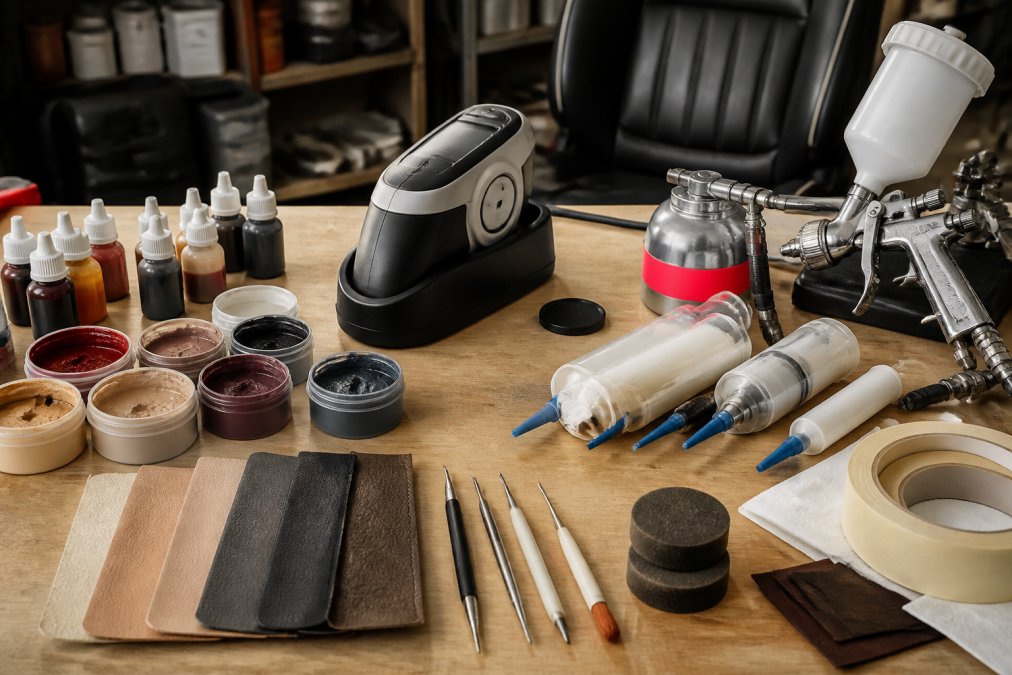
TrimKings brings material-specific tools directly to your vehicle with equipment pre-calibrated for your interior material type, saving time and ensuring repairs happen on-site with the correct tools.
How to Repair Cigarette Burns in Car Seats
Cigarette burns create surface scorching (top layer only, easier to repair) or structural damage (deeper penetration requiring extensive restoration).
Professional assessment determines burn depth: light surface burns need colour correction and coating; deeper burns require filling, texture matching, and multi-layer colour application.
Leather repairs involve cleaning, filling, sanding, multi-coat colour application, and protective sealant. Vinyl repairs follow the same process but use vinyl-specific products with different fillers and adhesives to match vinyl’s distinct surface pattern.
Attempting DIY cigarette burn repair often makes damage worse. Heat damage affects material structure, and incorrect filler or colour application can create permanent discoloration.
Many lease holders face penalties for cigarette burns when returning vehicles. Professional repair helps avoid these costly charges. A properly executed repair can help protect your end-of-lease finances.
Leather Seat Refinishing Cost and Process
Leather refinishing addresses discolouration and wear across entire seat areas, unlike spot repairs that treat isolated damage.
Refinishing involves deep cleaning, assessing colour fading and wear patterns, then applying new colour layers matching factory specifications.
Timeline varies from one visit for simple refinishing to multiple appointments for extensive restoration, allowing proper curing between layers.
Leather refinishing restores colour and depth, protects against staining and wear, improves comfort, extends lifespan, and maintains resale value. TrimKings specialises in leather restoration across all vehicle types.
Dashboard Scratch Repair Techniques
Dashboard scratches range from surface scuffs (clear coat only) to deep gouges (penetrating colour layer or substrate).
Assessment determines repair approach: light scratches may respond to polishing compounds; deeper damage requires filling, sanding, colour matching, and clear coat.
Dashboard material affects repair strategy, hard plastic, soft-touch vinyl, and leather-wrapped dashboards each require different products and techniques.
Dashboard repair involves cleaning, assessing depth, filling if needed, sanding, colour matching, and clear coat protection. Precision is critical because any colour variance or texture mismatch is immediately visible.
Matching Metallic and Pearl Finishes on Interior Trim
Metallic and pearl finishes present unique challenges for interior colour matching because reflective particles create colour-shifting effects depending on viewing angle and lighting.
Colour spectrometers measure metallic and pearl finishes differently because particles reflect light in ways solid colours do not. Technicians must account for particle size, concentration, and orientation.
Metallic finishes contain aluminium or mica particles; pearl finishes use ceramic or mica particles creating iridescent effects. Both require specialised mixing knowledge.
Challenges include lighting conditions affecting appearance, particle density variation changing perception, viewing angles creating different readings, and factory specifications varying by production batch.
Professional matching involves multiple angle measurements, reference samples under various lighting, precise pigment blending, test applications on hidden areas, and comparison under final repair lighting. Technicians must understand how light interacts with particles and adjust mixing ratios.
Metallic and pearl finishes cannot be matched by eye alone. Professional spectrometer analysis and experienced technician knowledge are essential for invisible repairs on these finishes.
Surface Preparation and Application Methods
Surface preparation determines whether a repair lasts or fails. Professional-grade results require careful attention to this stage, with methods varying significantly between spray dye and textured paint application.
Preparation begins with cleaning using specialised solutions (leather cleaners, vinyl-safe degreasers, plastic-safe solvents) to remove all dirt, oils, and residue that could cause adhesion failure or colour inconsistency.
Next comes sanding or abrading the surface. This step differs dramatically based on your chosen application method:
For Spray Dye Application (Leather and Vinyl):
Spray dyes penetrate material and require minimal surface abrasion, light scuffing with fine-grit sandpaper (220-400 grit) to remove topcoat. Over-sanding damages surface structure and causes uneven absorption. After sanding, clean thoroughly to remove dust. Dyes bond chemically with material fibres on clean, slightly porous surfaces.
For Textured Paint Application (Plastic and Vinyl):
Textured paints require aggressive surface preparation. Medium-grit sanding (120-180 grit) creates mechanical tooth for adhesion. Primer application is essential to create a uniform base and prevent substrate show-through.
Priming Decisions:
Priming is critical for textured paint but often unnecessary for spray dyes. Leather and vinyl rarely need primer before dye application. Plastic components almost always require primer before textured paint.
Application Method Selection:
Choosing between spray dye and textured paint depends on material type and damage extent:
-
Spray Dye works best for leather and vinyl because it penetrates the material, creating repairs that flex with the substrate and resist cracking. Dyes are ideal for colour matching and fading correction because they blend seamlessly with existing material.
-
Textured Paint works best for plastic components and vinyl trim that experiences heavy wear. Paint sits on top of the surface, providing a protective barrier against staining and UV damage. Textured paint is less flexible, making it unsuitable for leather that needs to breathe and move.
Application itself requires precision:
Spray Dye Application:
Multiple thin coats of dye are applied using fine-mist spray equipment. Each coat must dry completely before the next is applied, typically 15-30 minutes between coats depending on humidity and temperature. Dye application requires 3-5 thin coats to achieve proper colour depth and even coverage. The spray pattern must be consistent and overlap slightly to avoid streaking. Professional technicians use controlled spray pressure to avoid over-saturation, which causes the dye to pool and create dark spots.
Textured Paint Application:
Textured paint is applied in 2-3 coats using spray equipment calibrated for thicker coverage than dye. Each coat needs 30-60 minutes drying time. The spray pattern must match the original texture pattern of the material, this is critical for plastic dashboards where texture variation is immediately visible.
Spray dye and textured paint serve different purposes. Dye is ideal for flexible materials (leather, vinyl) where colour matching and material movement matter most. Textured paint is better for rigid materials (plastic) where durability and stain resistance are priorities.
Interior Material Specifics: Leather vs. Vinyl vs. Plastic
Each interior material requires distinct repair approaches. Understanding material differences helps explain why one technique works for leather but fails for vinyl or plastic.
Leather repairs require:
- Leather-compatible fillers that flex with material movement
- Dyes formulated for natural fibre absorption
- Protective coatings that allow leather to breathe
- Regular conditioning to maintain suppleness
Vinyl-specific requirements include:
- Vinyl-compatible adhesives that bond permanently
- Colour products that dry to match vinyl texture
- Flexibility-maintaining sealants
- Heat-resistant formulations for sun-exposed areas
Plastic repair needs:
- Hard-set fillers that match plastic rigidity
- Colour products formulated for plastic surfaces
- UV-resistant clear coats
- Adhesives that bond to plastic polymers
Frequently Asked Questions
How do professionals match existing car interior leather colours so accurately?
Professionals use colour spectrometers to analyse the exact pigment composition and shade of your original leather. This technology measures light reflection to identify the factory specification and any UV degradation. Combined with physical samples and test applications on hidden areas, spectrometer readings ensure seamless repair that blends invisibly with surrounding material. The process also accounts for variations in leather texture and finish, which affect how colour appears to the human eye.
What is the most difficult interior colour to match on a vehicle?
Metallic and pearl finishes are the hardest to match because they contain multiple pigment layers and reflective particles. These finishes shift appearance depending on viewing angle and lighting conditions. Additionally, faded or aged metallic interiors present extra challenges: the original factory specification may not match the current shade due to UV exposure. Vinyl and plastic trim with metallic flakes require precise pigment blending and clear coat layering to achieve colour accuracy and finish consistency.
Can you colour match faded car upholstery at home?
Colour matching faded upholstery at home is extremely difficult without professional equipment. Fading varies across the seat due to sun exposure, making it impossible to identify the true original colour by eye alone. Professional-grade colour spectrometers detect the factory specification beneath the faded layer, revealing the shade you need. DIY attempts often result in visible patches. Professional application also ensures proper substrate preparation, primer compatibility, and curing time.
How long does a professional interior colour repair last?
Longevity depends on surface preparation, primer compatibility, and the automotive-grade products used. Regular conditioning of leather and protective treatments for vinyl extend durability significantly.