Table of Contents
- Understanding Your Leather: Coated, Aniline, and Synthetic
- How to Clean Stained Car Leather Seats
- Best Leather Cleaner for Car Seats: Choosing Safe Products
- How to Condition Leather Car Seats
- Protecting Luxury Leather from Heat, UV, and Environmental Damage
- Leather Car Seat Repair and Restoration: When to Call a Professional
- A Maintenance Schedule for Luxury Car Leather
- Frequently Asked Questions
Last Updated: October 18, 2026
Understanding Your Leather: Coated, Aniline, and Synthetic
Not all luxury car leather is the same. How you maintain luxury car leather upholstery depends on the type, and the wrong approach can damage it permanently.
Coated leather is the most common in modern luxury vehicles. It has a protective polyurethane or acrylic layer on top that resists stains and moisture.
Identify your leather type via your vehicle’s documentation or by inspecting the seat in strong light: aniline looks natural and slightly uneven, coated looks uniform and glossy, and synthetic has a plastic-like sheen.
How to Clean Stained Car Leather Seats
Cleaning stained car leather seats means following a sequence that removes dirt without damaging the material, then adapting to the stain. Rush it and you’ll leave residue or create new damage.
Removing loose dust, dirt, and debris
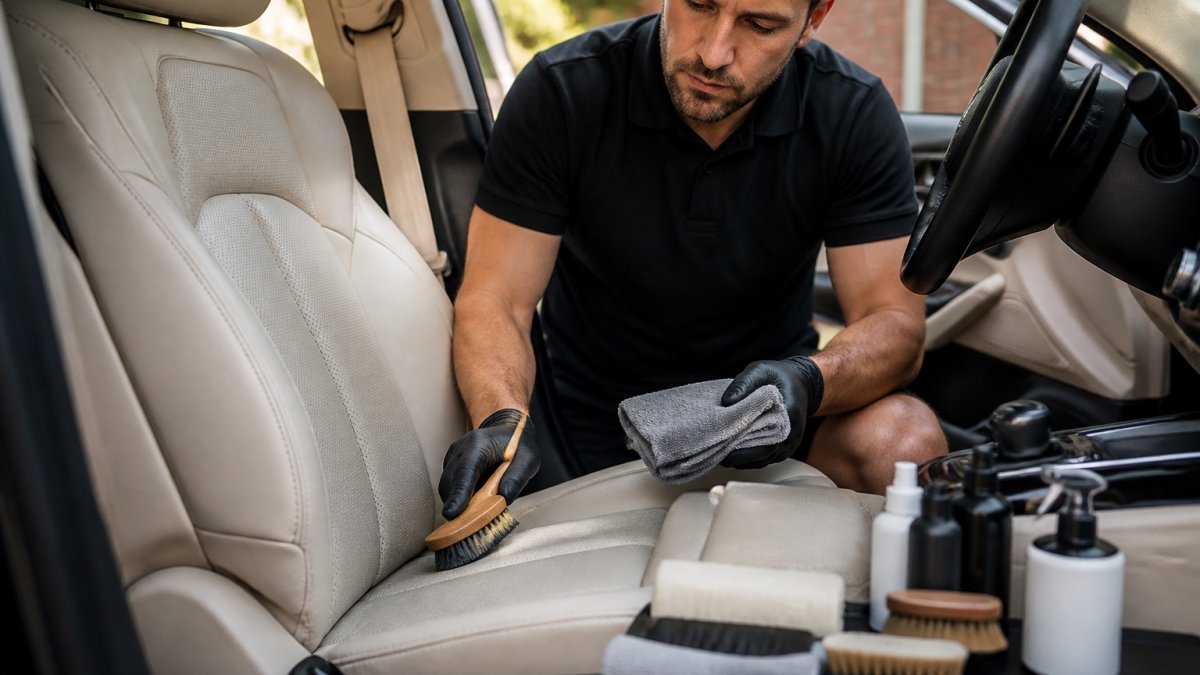
Start by removing surface dirt. Gently agitate the leather with a soft natural-bristle brush or microfiber cloth in small circular motions, without pressing hard.
A vacuum with a soft brush attachment works well, but keep suction low: high-powered vacuums can pull at the leather or damage delicate trim like piping and contrast stitching.
Testing on an inconspicuous area
Before applying any cleaner to a visible stain, test it on a hidden part of the seat, such as the underside of a cushion or the back of a headrest.
This prevents expensive mistakes: a cleaner that works on coated leather might strip aniline, and one safe for synthetic might stain genuine leather. Five minutes of testing saves you from ruining a £3,000 seat.
Cleaning one section at a time with microfiber cloths
Divide the seat into sections (left cushion, right cushion, backrest, headrest) and work on one at a time; applying cleaner across the whole seat risks uneven drying and residue marks.
Apply cleaner to a microfiber cloth, not directly onto the seat. Dampen the cloth (not dripping wet) and gently wipe in the direction of the leather grain, if visible.
Agitating dirt gently with a soft brush
For stubborn stains or ground-in dirt, gently agitate with a horse-hair or soft nylon brush in small circular motions for 10-15 seconds, then stop. Aggressive scrubbing breaks down the leather surface and can cause permanent texture damage, especially on aniline leather.
The goal is to help the cleaner penetrate and lift the stain, not to scrub it away mechanically.
Wiping away cleaner residue
This step is often rushed and causes visible marks. After agitating, wipe away all traces of cleaner with a fresh microfiber cloth dampened with distilled water, going over the area multiple times if needed; residue shows as a dull spot or streak once dry.
Overlap your wipes slightly for full coverage, and let the seat air dry completely before use, since sitting on damp leather can redeposit dirt into the pores.
A stain-by-stain response guide
The table below sets out the first response for the stains luxury interiors see most often. Always test any product on a hidden area first, and never scrub a fresh stain, blot, lift, and let the cleaner work.
| Stain type | First response | What to avoid |
|---|---|---|
| Dye transfer (from dark clothing) | Wipe immediately with a clean, damp microfiber cloth; if set, use a pH-balanced leather cleaner and gentle agitation | Rubbing hard, which drives dye deeper into the finish |
| Grease or oil | Blot with a dry microfiber cloth, then apply a small amount of leather cleaner and agitate gently | Water alone, which spreads oil across the surface |
| Ink | Dab with a cloth dampened with a dedicated leather-safe ink remover; do not rub | Household solvents, acetone, or alcohol-based products |
| Sunscreen | Wipe with a damp cloth, then clean with a pH-balanced leather cleaner; sunscreen often leaves a residue that attracts dirt | Leaving it until it bakes in under UV |
| Water marks | Dampen the whole panel evenly with distilled water and dry uniformly with a microfiber cloth | Spot-wetting, which sets a tide mark |
| Food and drink | Blot liquid first, then clean with a leather cleaner; for sugary spills, wipe before they dry | Hot water, which can set some stains |
For any stain, work from the outside in to avoid spreading it, and stop if the finish starts to look dull or tacky, that is a sign the product is too aggressive for the leather type.
Never use household detergents, dish soap, bleach, acetone, or general-purpose cleaners on luxury leather. They strip the protective coating on coated leather and can permanently discolour aniline leather. If a stain does not lift with a pH-balanced leather cleaner, escalate to a professional rather than trying a stronger chemical.
When a stain needs more than cleaning
Some marks are not surface stains: dye transfer that has penetrated aniline leather, ink soaked into a perforated seat, or a burn that has charred the surface won’t respond to cleaning and conditioning, and continuing can spread the damage. Stop and have the seat assessed by a leather repair specialist who can advise on re-dyeing, recolouring, or panel replacement.
Best Leather Cleaner for Car Seats: Choosing Safe Products
The wrong cleaner will damage your leather faster than any stain.
Safe leather cleaners are pH-balanced for automotive use, formulated to lift dirt without breaking down the leather’s natural oils or the protective finish on coated leather.
When in doubt, test first: a cleaner that works on one vehicle’s leather might not work on another’s, depending on the tannery, dye, and coating.
How to Condition Leather Car Seats
Conditioning maintains luxury car leather upholstery’s softness, flexibility, and appearance. Leather dries out over time, especially with heat and sunlight, and dry leather cracks, fades, and loses its suppleness.
Condition every two to three months for regular use, or more often if the vehicle spends significant time in direct sunlight or heat.
Apply conditioner to a soft cloth and work it in with gentle circular motions, focusing on high-contact, high-sun areas: the driver’s seat, steering wheel, and dashboard.
The conditioner should restore a slight sheen and supple feel; if it looks greasy or feels slick, you’ve applied too much.
Protecting Luxury Leather from Heat, UV, and Environmental Damage
Prevention is far more effective than repair.
Use sunshades or park in shade when possible; even a simple windscreen shade significantly reduces interior temperature and blocks direct UV.
Luxury interiors feature delicate details more vulnerable to damage: perforated leather (common in high-end sports cars) traps moisture and dirt, contrast stitching can fade unevenly in sunlight, and piping and trim crack at stress points.
Apply protector every three to six months, depending on sun exposure; a quality protector adds a UV-blocking layer that slows fading and repels water and dirt.
Leather Car Seat Repair and Restoration: When to Call a Professional
Some damage goes beyond cleaning and conditioning. Deep stains, burns, tears, and colour fading require professional intervention; DIY repairs on luxury leather often make problems worse.
Cigarette burns need careful assessment: a surface burn might be treatable with specialised products, but burns penetrating the leather’s thickness need professional restoration, with the burnt area removed and the gap filled and re-dyed to match seamlessly.
Significant colour fading, especially on aniline leather, often requires professional re-dyeing, a complex process demanding skill to match the original colour and preserve the leather’s natural feel.
TrimKings specialises in mobile leather seat refinishing and cigarette burn repairs.
A Maintenance Schedule for Luxury Car Leather
Consistency beats intensity. A simple routine prevents problems from developing, but the right interval depends on use, parking, and climate. The table below is a starting point, not a fixed rule.
| Frequency | Task | Why It Matters |
|---|---|---|
| Weekly | Vacuum loose dirt and debris | Prevents dirt from scratching leather during use |
| Monthly | Wipe with microfiber cloth and inspect for stains | Catches spills before they set permanently |
| Every 2-3 months | Apply leather conditioner | Maintains softness and prevents cracking |
| Every 3-6 months | Apply leather protector spray | Blocks UV and repels water and dirt |
| Annually | Deep clean if needed; inspect for damage | Addresses accumulated grime and catches wear early |
| As needed | Professional repair for burns, tears, or deep stains | Prevents small damage from becoming expensive problems |
Adjusting the schedule to how you use the car
A garaged weekend car needs far less attention than a daily driver in an open car park. Adjust the baseline to fit your circumstances.
- High-mileage or daily use: Shorten conditioning to every 6-8 weeks and inspect monthly for dye transfer on the driver’s seat and wear on the outer bolsters. The driver’s seat takes the most abrasion, so treat it as the canary for the rest of the interior.
- Children or pets regularly in the car: Vacuum weekly without fail and wipe the rear seats monthly. Pet claws and child seats create pressure points that wear through finishes faster than normal use.
- Direct sunlight or open-air parking: Apply protector every 3 months rather than every 6, and use a windscreen shade whenever the car is parked in strong sun. UV exposure is cumulative, so a car that sits outside every day ages its leather faster than one that is shaded.
Seasonal checks worth building in
A short seasonal inspection catches problems before they become repairs. In spring, check for winter salt damage and UV fading. In autumn, clean out summer sunscreen and sweat residue and check the protector still beads water. Before long storage, clean, condition, and apply protector, leaving the interior dry and ventilated rather than sealed up damp.
A simple test tells you whether the protector is still working: place a few drops of water on a hidden part of the seat. If they bead and roll off, protection is intact. If the water darkens the leather or spreads, it is time to reapply.
Don’t let months pass without attention: leather neglected for a year accumulates dirt, loses moisture, and becomes vulnerable to cracking and fading, and by the time damage is visible it has already begun to deteriorate.
Frequently Asked Questions
How often should I clean and condition leather car seats?
Clean leather car seats every two to three months with a leather-safe cleaner to remove surface grime and spills. Condition every three to four months to maintain softness and flexibility. In high-use vehicles or harsh climates, increase cleaning to monthly and conditioning to every two months. Regular maintenance prevents cracking, fading, and premature wear far more effectively than occasional deep cleaning.
What is the safest way to remove stains from leather car seats?
Blot fresh spills immediately with a clean microfiber cloth to prevent absorption. For set stains, test any cleaning solution on an inconspicuous area first. Apply a leather-specific cleaner with a soft brush using gentle circular motions, then wipe residue with a damp cloth. Avoid household detergents, soap, or harsh chemicals, which can strip natural oils and cause discolouration. For stubborn stains or damage like burns, professional leather restoration specialists have access to advanced techniques and colour-matched treatments.
Can household products such as oil soap or petroleum jelly damage car leather?
Yes. Household detergents, oil soap, shoe polish, and petroleum jelly can damage car leather by stripping protective oils, causing discolouration, or leaving residue that attracts dirt. Beeswax-based polishes may also clog leather pores. Stick to products specifically formulated for leather upholstery. If you’ve accidentally used a household product, wipe the area thoroughly with a damp microfiber cloth and apply leather conditioner to restore protection.
How can I protect luxury car leather from cracking, fading, and wear?
Apply a leather protector after conditioning to create a barrier against UV rays, heat, and humidity. Park in shade or a garage when possible to reduce UV exposure and fading. Use sunshades on sunny days. Condition regularly to maintain flexibility and prevent cracking. Avoid extreme temperature fluctuations and prolonged moisture exposure. Be mindful of perforations, contrast stitching, and delicate trim when cleaning, as these areas are more vulnerable to damage and require extra care.
When should leather car seats be professionally repaired or restored?
Seek professional leather car seat repair and restoration for deep tears, cigarette burns, significant colour fading, or perforations in luxury leather. Professionals can colour-match repairs seamlessly, refinish damaged sections, and restore structural integrity. This is especially important for lease vehicles nearing end-of-lease inspections, where professional-quality repairs prevent costly penalty charges. DIY methods work for maintenance and minor surface stains, but damage affecting leather structure or aesthetics requires specialist expertise.
What’s the difference between coated, aniline, and synthetic leather?
Coated leather has a protective polyurethane layer, making it stain-resistant and easier to clean; it’s common in modern luxury cars. Aniline leather has no protective coating, allowing natural breathability but requiring more careful maintenance and protection. Synthetic leather mimics genuine leather but often requires different cleaning products and doesn’t age the same way. Identify your leather type from your vehicle manual before selecting cleaners and conditioners, as products safe for one type may damage another.
Does WD-40 or Vaseline preserve leather?
No. WD-40 is a penetrating oil designed for machinery, not leather, and can leave sticky residue and attract dust. Vaseline (petroleum jelly) clogs leather pores and causes discolouration over time. Both are unsuitable for car leather upholstery. Use leather-specific conditioners formulated to maintain softness, flexibility, and colour whilst providing UV and moisture protection. These products are designed to work with leather’s natural properties rather than against them.