Quick Summary
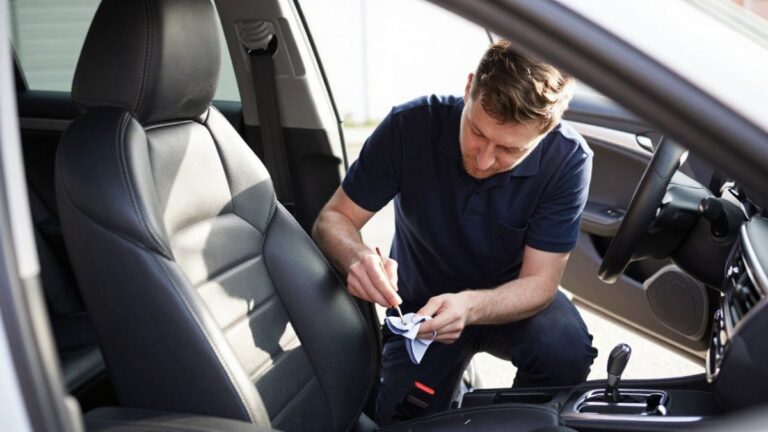
To remove ink stains from car leather seats safely, first test your cleaner on a hidden area, then blot fresh ink with a dry microfiber cloth rather than rubbing. Work gently from the outside of the stain toward the centre, and finish by conditioning the leather. Stop if the finish starts to dull, change colour, or feel tacky.
- Test any cleaner on a hidden area, such as under the seat, before treating the visible stain.
- Blot fresh ink with a dry cloth, and dab rather than rub so the ink does not spread.
- Work from the outside of the stain toward the centre to keep the mark from enlarging.
- Apply leather conditioner once the area is dry to restore moisture to the leather.
- Stop immediately if the leather turns dull, tacky, or darker, since the finish is being damaged.
Table of Contents
- Why Ink Stains on Car Leather Need Careful Handling
- Identify Your Leather Type and Finish Before You Clean
- How to Remove Pen Marks From Leather Car Seats Step by Step
- Choosing a Leather Car Seat Cleaner for Ink Stains
- How to Get Dried Ink Out of Leather Without Damage
- How to Clean Leather Car Seats Safely After Stain Removal
- Booking Professional Ink Stain Repair With TrimKings
- Frequently Asked Questions
Why Ink Stains on Car Leather Need Careful Handling
Ink on car leather is one of the more stubborn interior problems, and knowing how to remove ink stains matters more than most people expect.
That is why the careful approach matters. For help working out your leather type and finish before you start, see our car leather repair assessment guide.
Ink stains are marks left by pen or ink residue that sit in or on the leather’s top coat. Fresh ink is usually easier to lift than ink that has dried and bonded to the surface.
Two things decide how hard the job will be:
- How old the stain is. Fresh ink can often be lifted in one sitting. Dried ink may need several gentle passes.
- What the leather is made of. Protected, coated leather tolerates more than unfinished or aniline-style hides.
Identify Your Leather Type and Finish Before You Clean
Before you touch the stain, check what you are working with. Car seats use different leather types and finishes, and the same product can help one seat and harm another.
Look at the seat in good light and ask a few simple questions:
- Is the surface glossy, satin, or matte?
- Does it feel sealed and smooth, or does it soak up water quickly?
- Is there any visible wear, cracking, or previous repair?
Most modern car leather has a protective top coat. If water beads on the surface, that coat is usually intact.
A common mistake is treating all leather the same. A cleaner that works well on a sealed seat can lift colour from a worn or unfinished one.
How to Remove Pen Marks From Leather Car Seats Step by Step
Work through these steps in order. Do not skip the test in the first step.
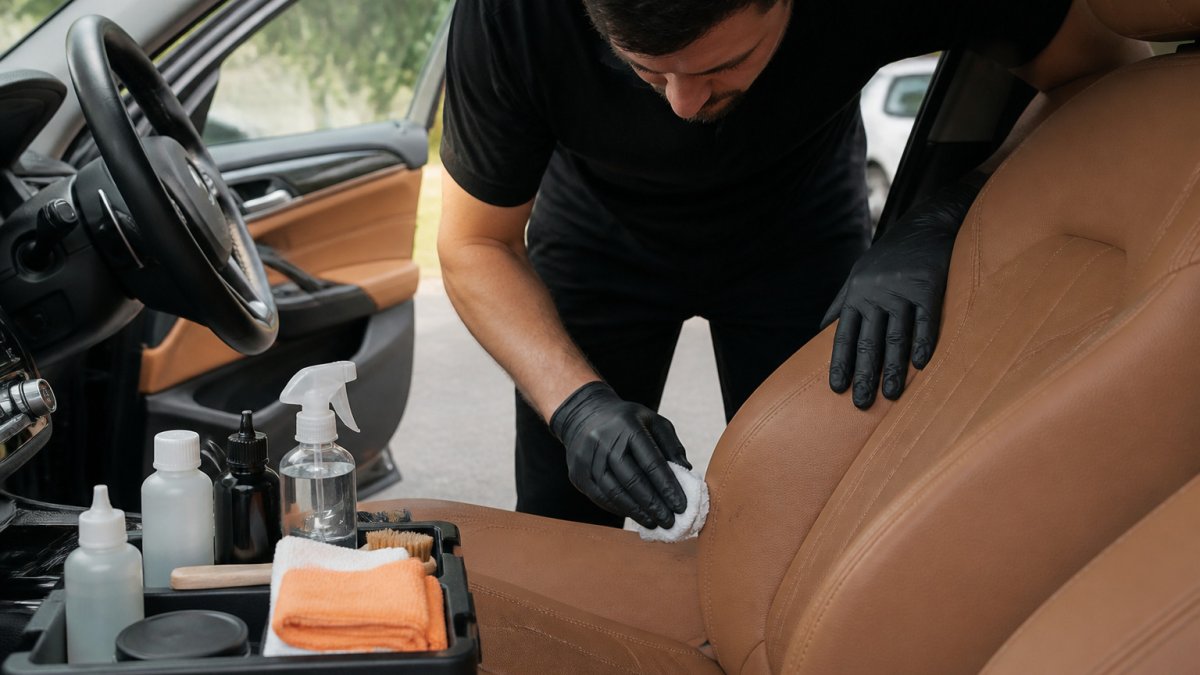
- Gather your supplies. You will need a few soft microfiber cloths, cotton swabs, a mild soap or leather-safe cleaner, and clean water. Keep a dry cloth ready for finishing.
- Test on a hidden area. Pick a spot under the seat or along the lower edge.
- Blot the fresh ink. Press a dry cloth onto the stain to lift as much as you can.
- Apply a small amount of cleaner. Use a cotton swab or cloth, never a soaked pad.
- Work from the outside of the stain toward the centre. This stops the mark from spreading.
- Wipe away residue. Use a damp cloth with clean water, then dry the area.
- Condition the leather. Once the area is dry, apply a leather conditioner to restore moisture.
Test Any Method on a Hidden Area First
A hidden-area test tells you how the leather reacts before you risk the visible seat.
Apply the same cleaner you plan to use, wait a few minutes, then wipe it with a dry cloth. Check for colour transfer, a sticky feel, a dull finish, or any change in texture.
Watch out: do not assume a product is safe because it worked on a different car. Each seat finish reacts differently.
Blot Fresh Ink Without Spreading It
Fresh ink is easiest to remove when it is still on the surface. Press a dry, clean cloth gently onto the mark and lift.
Dab rather than rub. Rubbing pushes ink deeper into the grain and can spread it across a wider area.
The steps below follow the order to work through, with a hidden-area test first and drying and conditioning at the end.
| Step | What to do | Time or frequency |
|---|---|---|
| Gather supplies | Microfiber cloths, cotton swabs, mild soap or leather-safe cleaner, clean water | Before starting |
| Test on a hidden area | Apply the planned cleaner to a spot under the seat or lower edge | Wait a few minutes, then check |
| Blot fresh ink | Press a dry cloth onto the stain to lift ink | Repeat with fresh cloth sections |
| Apply small amount of cleaner | Use a cotton swab or cloth, never a soaked pad | Per pass |
| Work outside to centre | Move from the edge of the stain toward the centre | Throughout |
| Wipe residue | Damp cloth with clean water, then dry | After cleaning |
| Condition the leather | Apply leather conditioner once dry | Once the area is dry |
Choosing a Leather Car Seat Cleaner for Ink Stains
Not every cleaner suits every stain, and on car leather the order in which you try them matters more than the brand on the bottle. The safest approach is a ladder: start with the least aggressive method, test it, and only step up when the stain has clearly stopped responding. Treating remedies as interchangeable is how finishes get dulled.
A conservative ladder, least aggressive first
Work down this list in order. Do not skip a rung because you are impatient, each step up carries more risk to the top coat.
- Dry blotting. A clean, dry microfiber cloth, pressed and lifted. No product at all. This lifts surface ink and tells you whether the mark is fresh.
- Mild soap solution. A few drops of pH-neutral hand or car wash soap in warm water, applied to a cloth, never poured onto the seat. This is the default first choice for most fresh marks on sealed leather.
- Dedicated leather-safe cleaner. A product labelled for automotive leather, applied sparingly with a cotton swab. Use this when soap has lifted some but not all of the ink.
- Diluted isopropyl alcohol. A cautious option for stubborn ink on sealed, coated leather only. Apply to a swab, keep contact brief, and neutralise afterwards with a damp cloth.
- Professional assessment. If rungs 1-4 have not worked after several gentle passes, stop. Further home treatment raises the risk of a thinned or discoloured patch.
Household remedies such as white vinegar, baking soda, acetone, nail polish remover, and magic erasers are best avoided on car leather. They are either too acidic, too abrasive, or too aggressive for the top coat, and damage often shows up days later as a dull or tacky patch.
Match the method to the finish
Before you pick a rung, confirm what you are cleaning. The same product behaves very differently across finishes.
- Coated or protected leather. The most common type in modern cars. A sealed top coat means water beads on the surface. This finish tolerates the full ladder, including brief, diluted alcohol on stubborn ink, but only after a hidden-area test.
- Semi-aniline leather. Softer, with a thinner finish and more visible grain. Water may darken it slowly rather than bead. Skip alcohol entirely and stay on rungs 1-3.
- Aniline or unfinished leather. Porous, absorbent, and easily stained by the cleaner itself. Water darkens it within seconds. Do not use alcohol, soap solutions, or any wet method without manufacturer guidance, ink removal here is a professional job.
If you are unsure which finish you have, the vehicle handbook or the leather-care guidance supplied with the car is the authoritative source. Check it before you start, not after.
Stop conditions
Stop immediately and do not escalate if you see any of the following during a test or a pass:
- Colour transferring onto the cloth that is not ink-coloured
- The surface turning dull, chalky, or tacky
- The leather darkening and staying dark once dry
Any of these means the method is attacking the finish, not the ink.
For a finish-by-finish breakdown of which products suit which seats, read our guide on how to repair car leather seats when cleaning is not enough.
How to Get Dried Ink Out of Leather Without Damage
Dried ink is a different problem from fresh ink. It has had time to bond with the top coat, and on porous finishes it may have migrated into the grain. That changes both the method and the realistic outcome. Set expectations before you start: a set-in mark may lighten substantially over several gentle sessions without disappearing completely, and forcing a full removal is how finishes get damaged.
Know your ink type first
Ink is not one substance, and the type on the seat should shape your approach.
- Ballpoint ink. Oil-based and the most common. It sits largely on the surface when fresh and responds best to dry blotting followed by a mild leather cleaner. Dried ballpoint often lifts slowly, in stages.
- Gel ink. Water-based, so it can spread into the grain quickly and may re-wet when you apply a damp cloth. Blot rather than wipe, and change cloth sections often to avoid pushing pigment sideways.
- Permanent marker. Solvent-based and the hardest to shift. It can penetrate the top coat and, on semi-aniline or aniline leather, may not be fully removable without refinishing. Do not attack it with strong solvents at home.
Fresh versus set-in: what to expect
- Under an hour old. Usually lifts in one sitting with dry blotting and a mild soap solution.
- A few hours to a day old. May need two or three gentle passes with a leather-safe cleaner, with drying time between.
- Several days or longer. Expect lightening rather than full removal. Work in short sessions, let the leather dry fully between them, and reassess.
The method for dried marks
- Dry blot first. Press a clean microfiber cloth onto the mark and lift. Do this before any liquid, adding moisture to dried gel or highlighter ink can spread it.
- Apply cleaner to a swab, not the seat. A lightly dampened cotton swab gives you control and keeps moisture localised. Work in small circles over the mark only.
- Work from the outside in. Start at the edge of the stain and move toward the centre so you do not enlarge the mark.
- Switch cloth or swab frequently. A loaded swab transfers colour back onto the seat. Use a fresh section every few passes.
- Let the leather dry between sessions. Drying reveals what has actually lifted and prevents over-wetting the finish.
- Neutralise and condition. Wipe residue with a damp cloth, dry fully, then apply a thin layer of leather conditioner and buff it off.
Objective success checks
Judge the result in daylight, not under garage lighting, and check for all of the following:
- Ink colour has reduced without the surrounding leather changing shade
- The surface sheen matches the surrounding area, no dull or glossy patch
- No tacky or sticky feel once dry
If the ink has lightened but the finish is intact, you have a good result. If the finish has changed, stop and seek professional assessment, continuing will make it worse.
Dried ink is a test of patience, not strength. Several short, gentle sessions with drying time between them are safer and usually more effective than one long, aggressive attempt.
For surface wear and cracking that can appear after stubborn stain work, see how to repair leather car seat cracks step by step.
How to Clean Leather Car Seats Safely After Stain Removal
Once the ink is gone, aftercare protects the work you have done. Clean residue with a damp cloth, then dry the seat fully.
Next, apply a leather conditioner in a thin layer and buff it off. Conditioner restores moisture and helps the finish look even.
Keep the area dry and avoid heavy scrubbing for a few days. Regular gentle cleaning will help prevent new marks from setting.
Booking Professional Ink Stain Repair With TrimKings
Some ink stains respond well to careful home treatment. Others, especially deep marks on worn or thin leather, may need a professional eye.
TrimKings provides mobile car interior repair across the West Midlands, so the work can be done at your home or workplace. To see what leather seat restoration typically involves cost-wise, read our cost of leather car seat restoration page.
Frequently Asked Questions
How do you get ink off leather car seats?
Start by identifying the leather finish and testing your chosen method on a hidden area such as under the seat or along the lower edge of the backrest. For fresh ink, blot gently with a dry cloth to lift as much as possible, then work a small amount of a dedicated leather cleaner onto a soft cloth and dab from the outside of the stain toward the centre. Avoid rubbing, which spreads ink and can wear the protective top coat. Wipe away any residue with a barely damp cloth and dry the area. If the stain has not lifted after a few gentle attempts, stop and seek advice rather than increasing the strength of the cleaner.
Does washing-up liquid remove ink from leather?
Mild washing-up liquid diluted in water can sometimes lift fresh ink from a sealed leather finish, but it is not the safest first choice for car seats. Detergents can strip the protective top coat and leave a dull or patchy area, and some leathers are more sensitive than others. Always test on a hidden area first, use the mildest solution that works, apply it with a cloth rather than soaking the seat, and follow up with a leather conditioner suited to automotive upholstery once the area is dry.
How can you remove dried ink from a leather car seat?
Dried ink is harder to lift because it has bonded with the top coat. Use a leather cleaner designed for upholstery and apply it gently with a soft cotton swab, working in small circles on the stain only. Rubbing alcohol can be effective on some finishes but is aggressive, so use it sparingly, on a test area first, and never on a delicate or heavily worn finish. If the ink is set deep into the grain, or the leather is cracking or discolouring, stop and consult a professional leather repair specialist, as further attempts may cause permanent damage.
When should you stop cleaning and call a leather repair professional?
Stop as soon as you notice colour transfer to your cloth, the finish becoming tacky or dull, the leather cracking, or the stain spreading. These are signs of damage that home methods can make worse. A professional can assess the leather finish and advise on repair. TrimKings provides mobile car interior repair across the West Midlands, and you can send a photo of the damage to request a no-obligation quote.